|
|
|
|
|
|
|
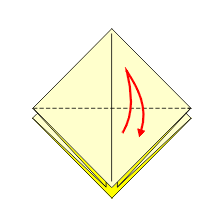
1 |
|
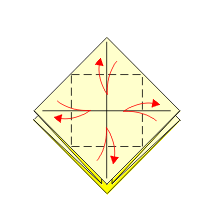
2 |
|
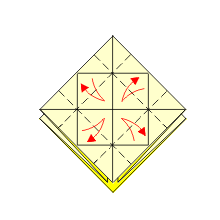
3 |
|
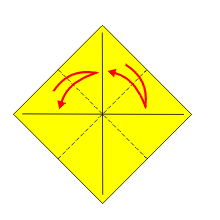
Valley fold the opposite corners together, in turn,
to mark the diagonal fold lines, and open them up. Then, turn the paper over. |
|
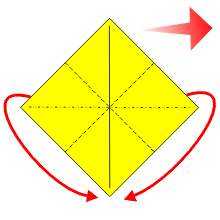
Valley fold the opposite sides together in both
directions, and open them up. |
|
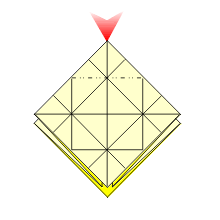
Bring the sides together and down towards you. Press
the paper down neatly, thereby making a shape that, in origami, is called the
preliminary fold. |
|
|
|
|
|
|

|
|
|
|
|
|
|
|
|

|
|
|
|
|
|
|
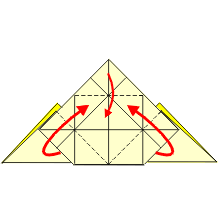
13 |
|
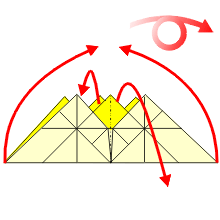
14 |
|
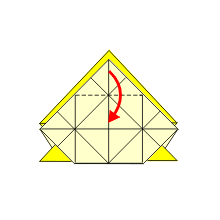
15 |
|
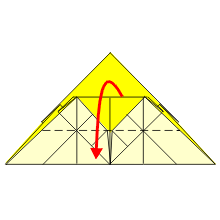
Valley fold the top edge over to meet the bottom. |
|
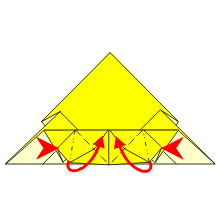
Open out the little pockets at the bottom and squash
them into triangles as shown in the next step. |
|
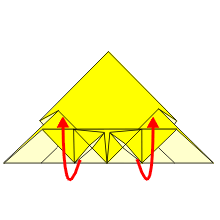
Lift the front flap up to the top. |
|
|
|
|
|
|
|
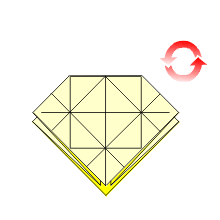
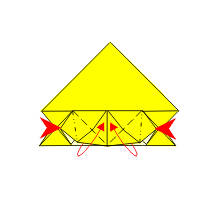
16 |
|
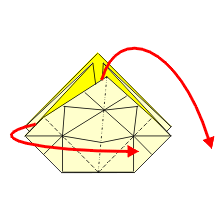
17 |
|
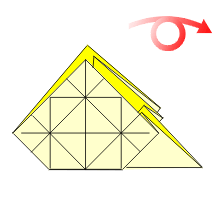
18 |
|
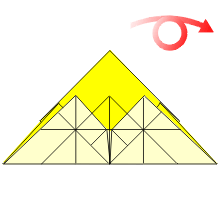
This should be the result. |
|
Repeat steps 12-15. |
|
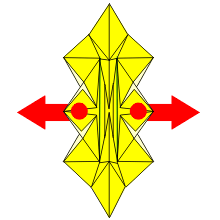
Bring the right- and left-hand sides together and
up. At the same time, move the top points down in the direction shown by the
arrows. Then turn the model into the position shown in the next step. |
|
|
|
|
|
|
|
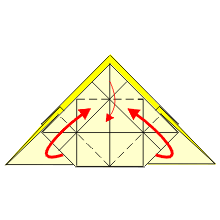
19 |
|
20 |
|
21 |
|
Valley fold the top corner down along the existing
fold-line. |
|
Valley fold the lower sloping edges as shown and
cover them with the top edge. |
|
Open out the little pockets at the bottom and squash
them into triangles. |

|
|
|

|
|
|